
Calligraphy Engraving Home Studio (Part 1)
/In Ontario, Canada we are currently having a second lockdown. The first lockdown in 2020 lasted for 5 months. With the Covid-19 cases being much higher than last year, I assume that it will be a long ride. So I decided to upgrade my home studio to make it a place where I will enjoy creating.
I decided to move my space from upstairs next to my bedroom to the basement where the guest room is. So my son can have his own space for his virtual learning and I can have my own space. The challenge of the room in the basement that it is colder and has no windows. But, I made it work and it became my most favourite spot in the whole house!
Read further to find out my studio upgrade journey!
Before

The guest room in the basement before makeover
The room was initially intended to be a guest room. But we only had 1 guest sleeping over at our place 7 years ago and with the pandemic, we can’t really have guests over anyway. This room had a bed, TV and my kids’ old toys that were just piling up.
I did not want to keep the TV as I didn’t really need it and it would take so much space. I also could not vibe with the beige wall. I needed this room to be really bright so I can create better.
The Planning
I wanted this studio to be bright, full of inspiration and has a romantic vibe. So my plan was to have:
One statement wall with a mural design
All furnitures to be white + cozy task chair in accent colour
All the walls to be white
Have a statement light fixture
Have separate desks for computer, calligraphy, and engraving work so I don’t have to keep rearranging my tools
Using a therapy light to accommodate my lack of windows
Add a Dreambox to organize my supplies (this will be in Part 2 when I receive the furniture)
The Mural
This was my first time doing a mural. Typically, a muralist would use a projector and trace the line but since it is a small wall, I was able to sketch my concept on paper and redraw on the wall with a pencil. For this wall, I decided to do minimal design of floral line drawing with no shading.
Once the sketch is drawn, I used regular wall paint in grey and a regular brush. I preferred brush over a pen marker. The imperfections of the line make it more natural. The fluidity of the paint made me work so much faster that I was able to complete the whole wall in 2 hours.

The completed floral mural

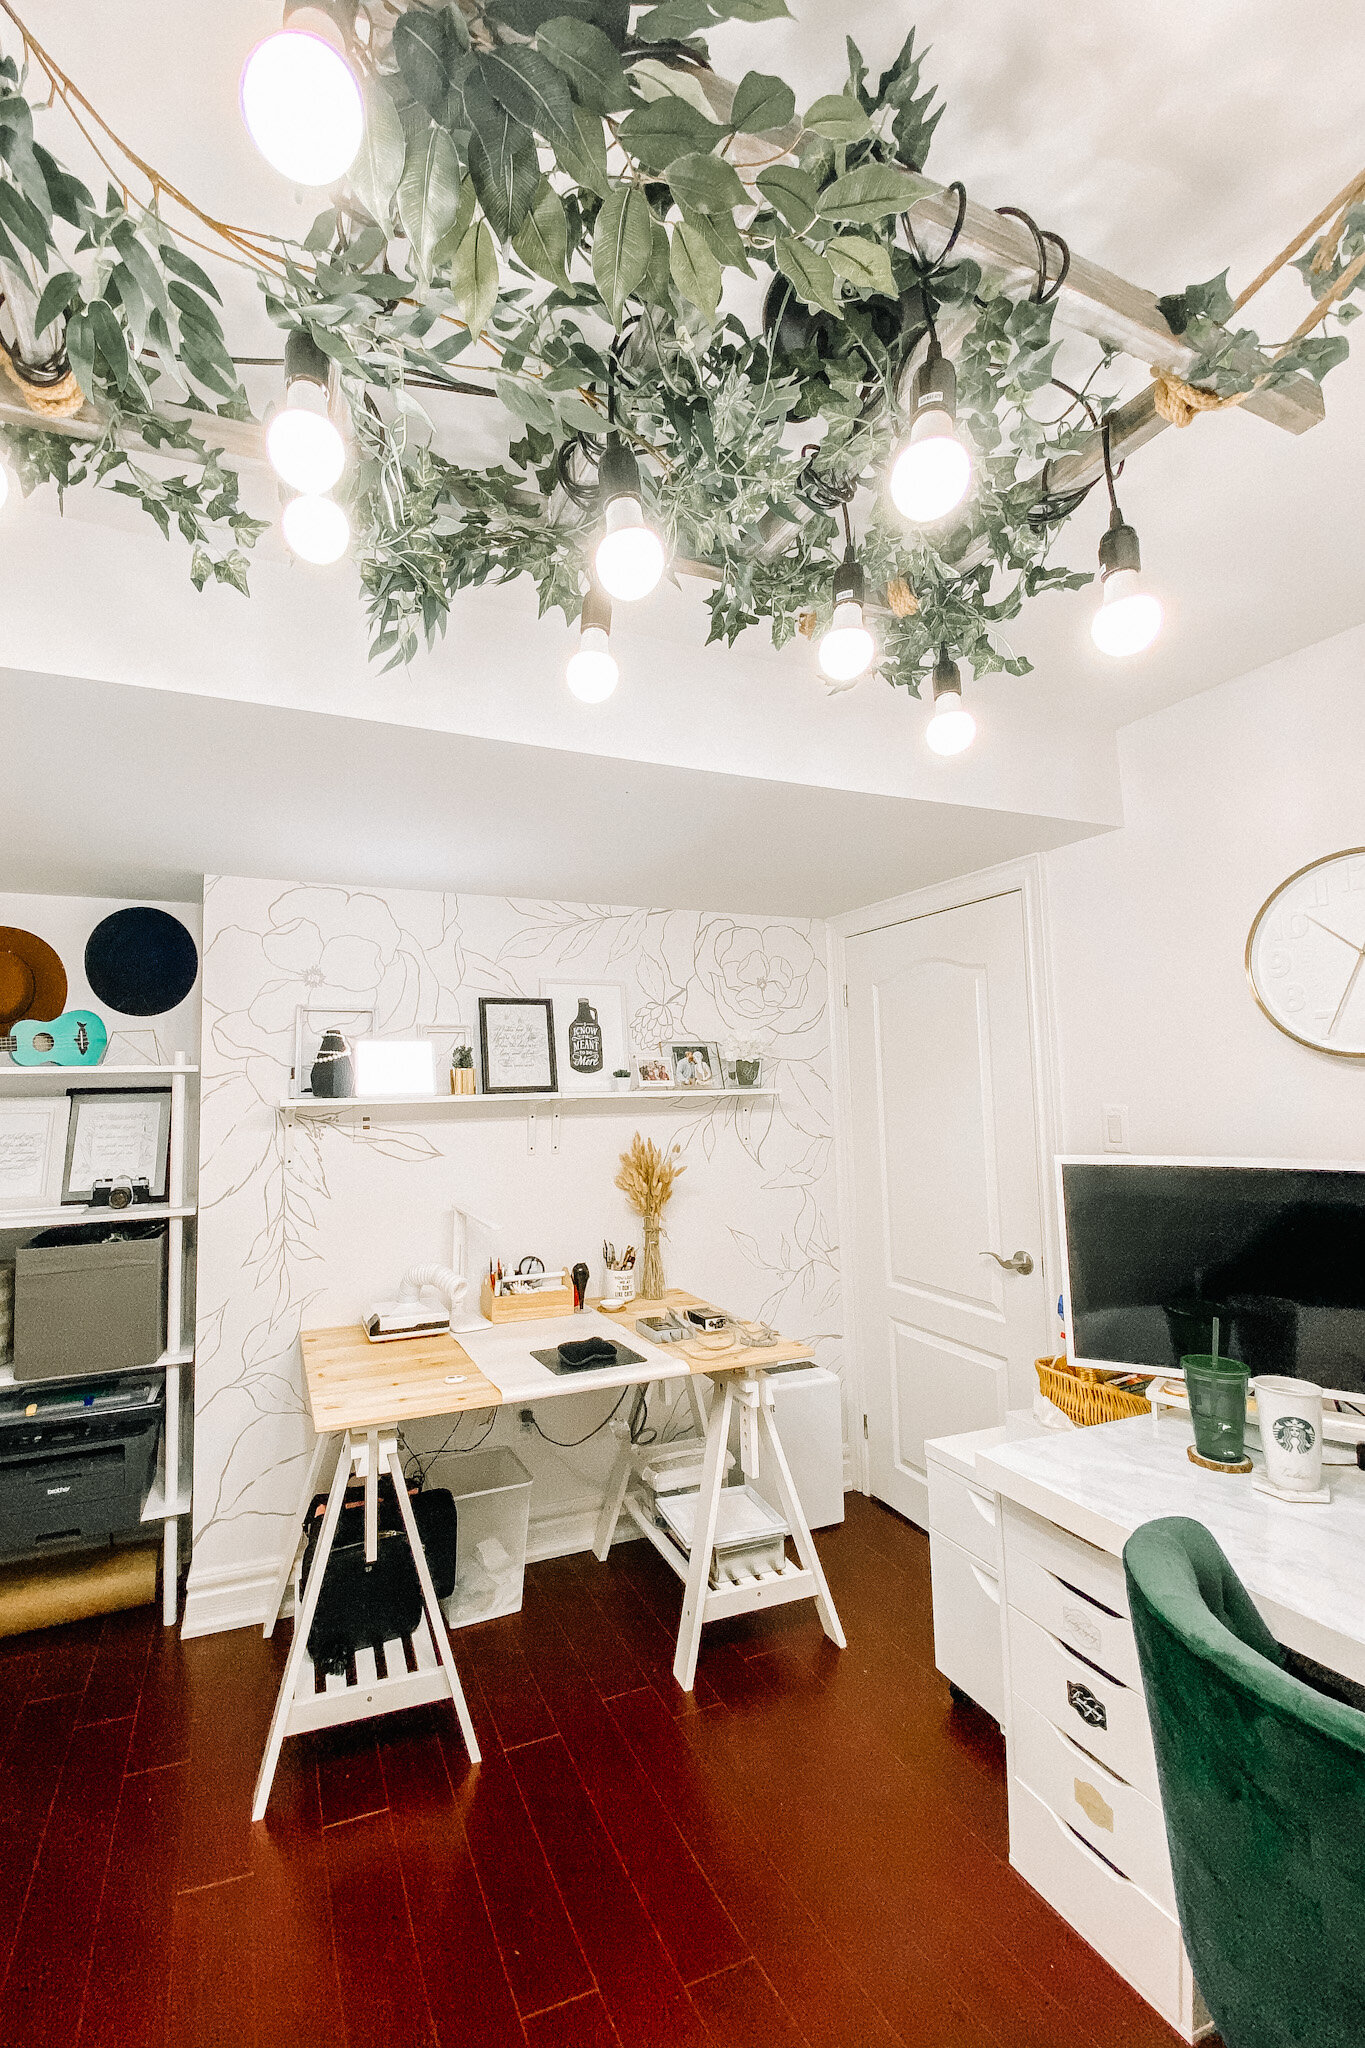
The corner after adding desk and floating shelf
This corner wall with the floral mural painting became my engraving space. I added a long floating shelf to add my therapy light and some decor items including a diffuser, pictures, few of my work, a print by Doris Wai and some artificial plants. The therapy light actually makes a difference in my mood. I feel happier and more energized to work. This was purchased from Amazon. My task chair is from Wayfair. It is super comfortable and one of my favourite things in this room.

The Light Fixture
I envisioned my studio to have a romantic vibe and I love seeing string lights at weddings. I decided I wanted to incorporate something similar. Here’s what I did:
I purchased a Spider Web Chandelier from Wayfair and daylight bulbs from Amazon.
I hung a decorative ladder that I had and never used on the ceiling by attaching 4 hooks. In order to do this, I had to make sure I used a stud finder to find the right spot to drill the hooks into the ceiling. I used a thick twine rope to attach the ladder on to the hooks (see image).
After the chandelier is installed on to the ceiling, I wrapped around the cords on to each of the ladder step.
Then, I wrapped around some artificial foliage garland on the ladder to complete the look.

The ladder after it’s hung before wrapping around the light cords and artificial foliage garland
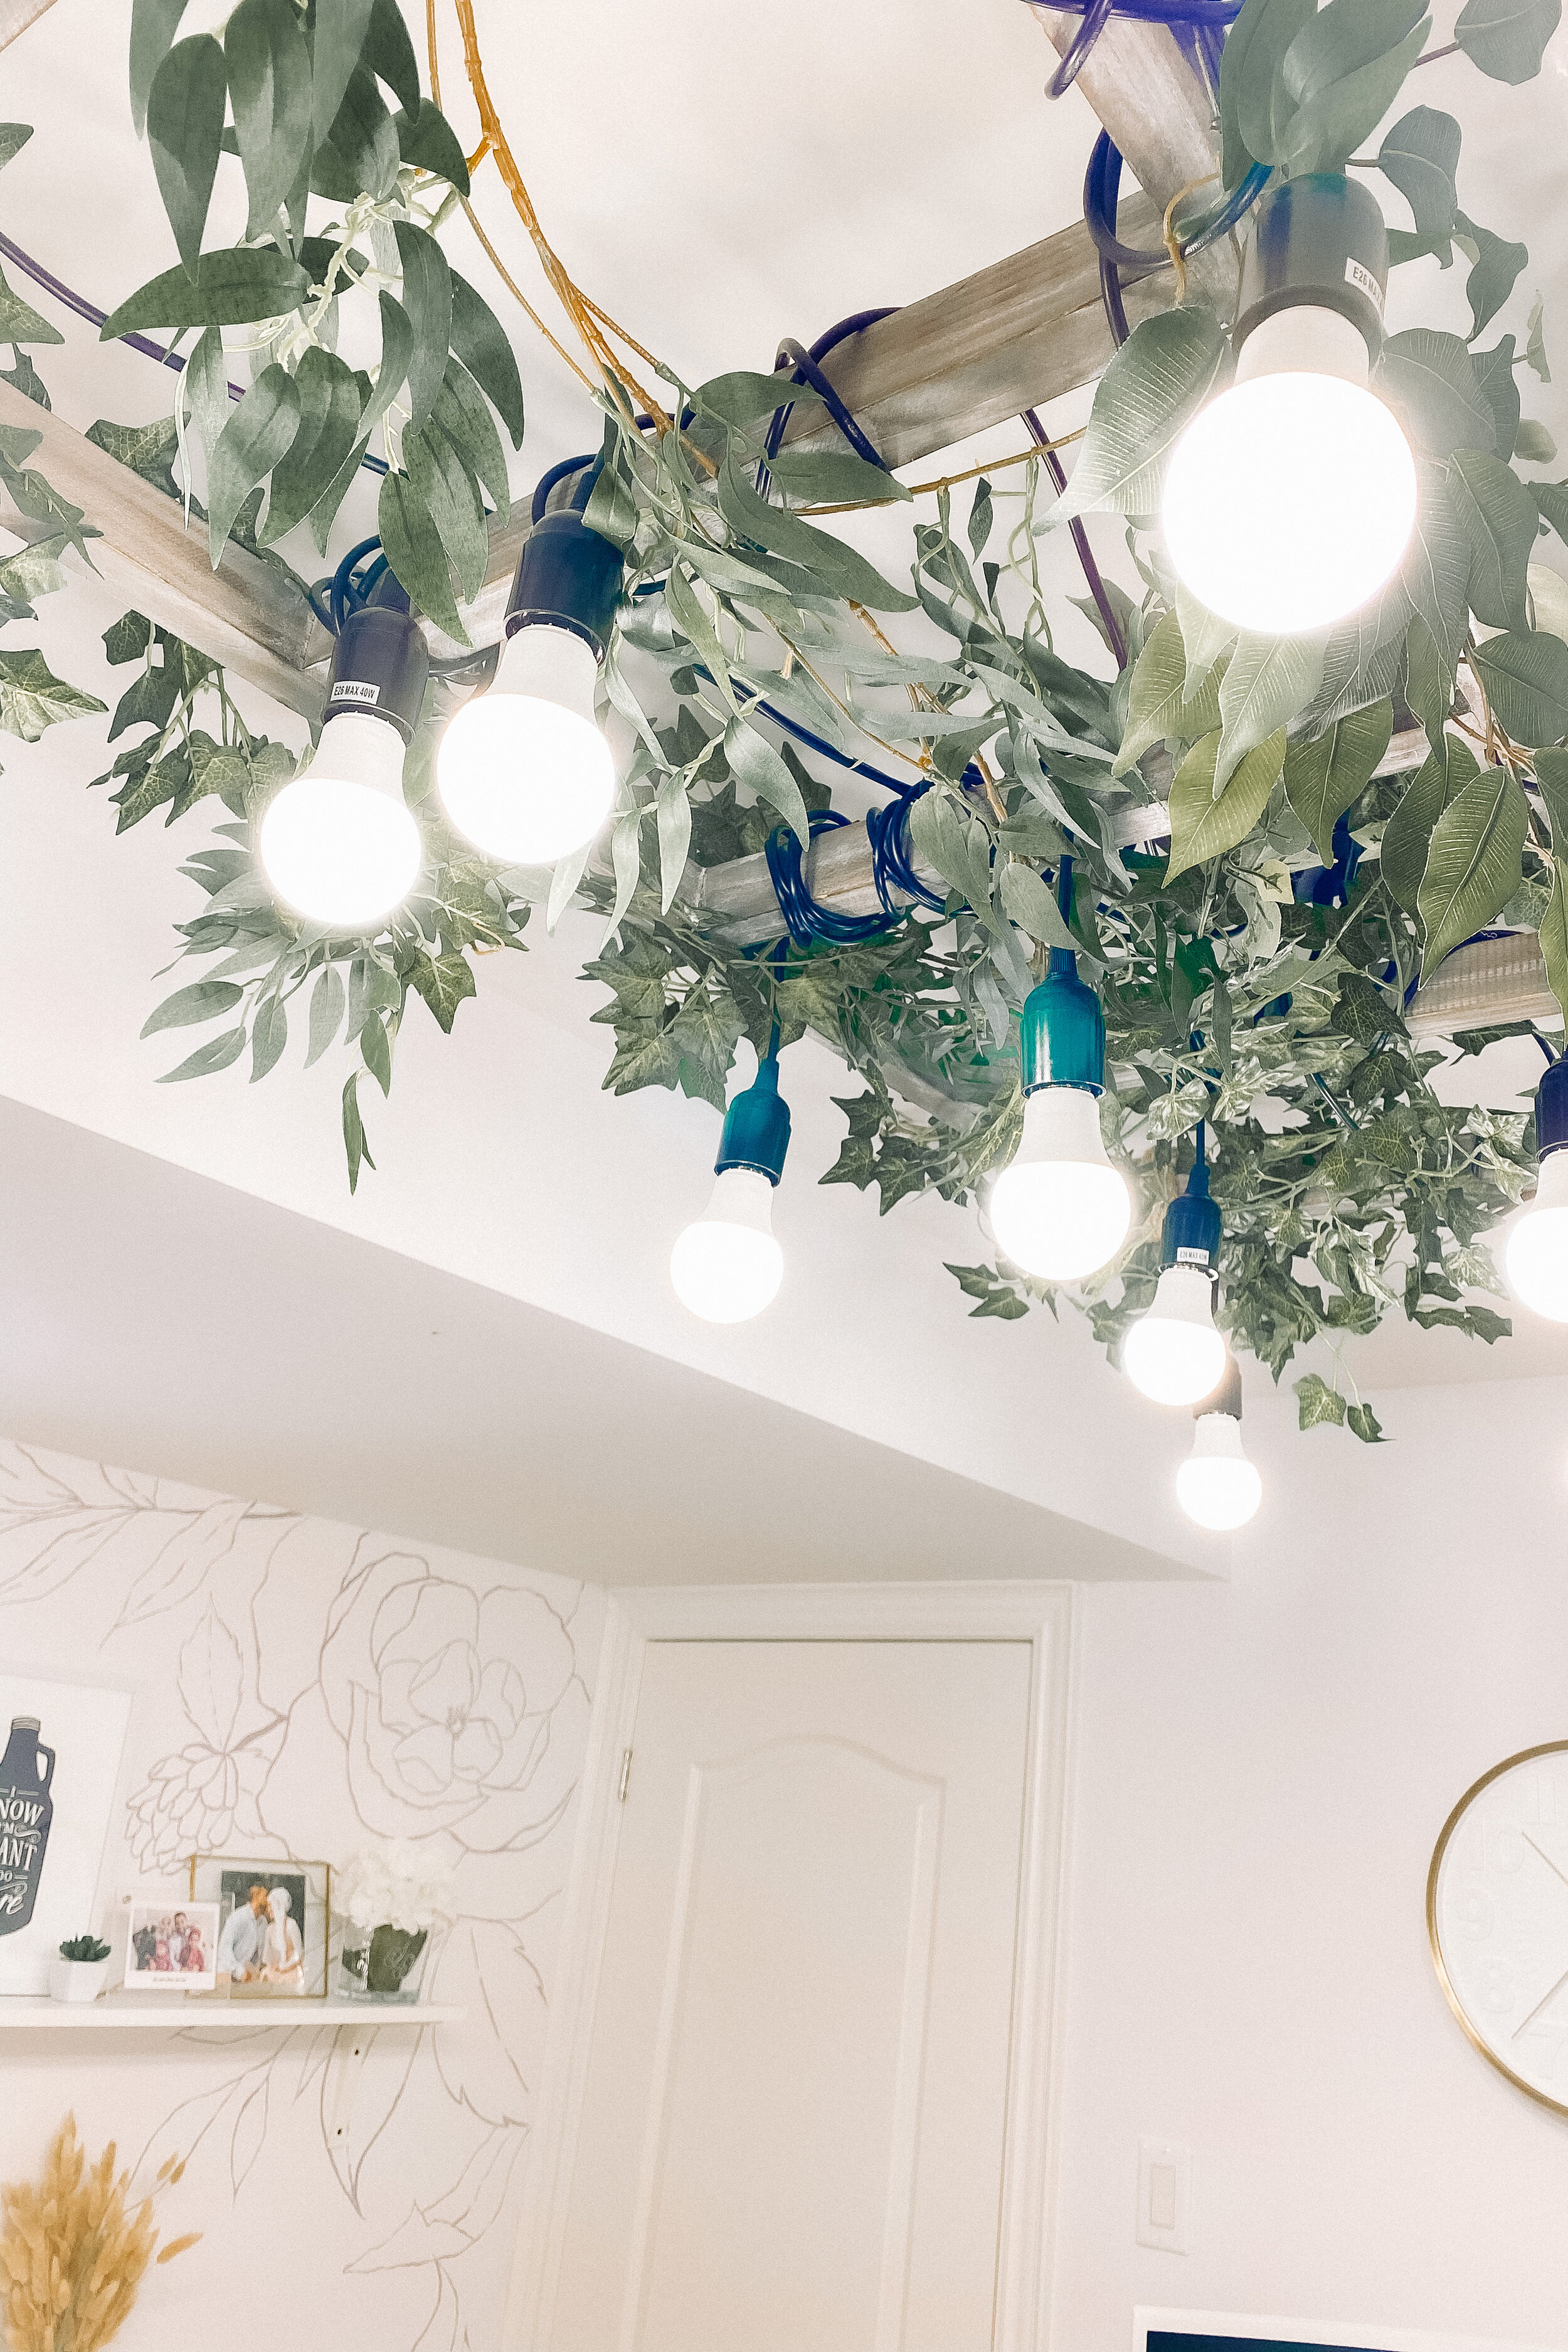
The completed look of the light fixture with the bulbs and artificial foliage garland
I’m very pleased with how it turned out. It motivates me to create. It also pushes me to stay organized. I hope this post inspires you if you are thinking of giving your studio a makeover.

Stay tuned for Part 2 when I receive the Dreambox!